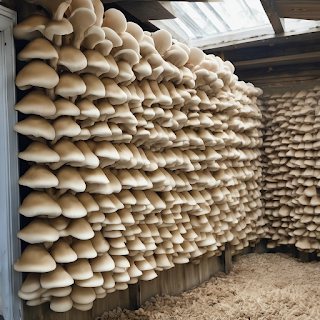
Growing Your Own Gourmet Mushrooms - A Complete Beginner's Guide
Have you ever wanted to try your hand at mushroom cultivation but felt overwhelmed by all the steps involved? Or maybe you love fresh mushrooms but find them too expensive to buy regularly? Cultivating mushrooms at home is easier than you think, and what better time to start than spring? In this complete beginner's guide, I'll break the process down step-by-step so you can grow delicious mushrooms without any prior experience. By the time you finish reading, you'll have everything you need to know to start your first successful mushroom crop!
Getting Started - Choosing Your Mushroom Variety
- The first decision is selecting which type of mushroom to grow. Some popular choices for beginners include:
- Oyster mushrooms (Pleurotus ostreatus): Fast growing, tolerant of a wide range of conditions. Great flavor.
- Shiitake mushrooms (Lentinula edodes): More challenging but very rewarding. Fantastic umami taste.
- Lion's Mane/Bear's Head mushrooms (Hericium erinaceus): Unique texture and health benefits. Easy to cultivate.
- Pink Oyster mushrooms (Pleurotus djamor): Beautiful pink color. Similar care as white oysters.
Consider which varieties are easiest to find growing kits or supplies for where you live. Oysters and lion's mane are good options widely available. Read product descriptions closely to ensure you have the right materials.
Preparing Your Growing Substrate
Most mushrooms are grown on sterilized substrates like hardwood sawdust, straw, or agricultural byproducts. You have two options - make your own substrate or purchase a pre-made growing block or kit. Kits are simplest but making substrate from scratch allows customizing.
To make your own, you'll need:
- Hardwood sawdust OR wheat/rice straw
- Bucket or container for pasteurizing
- Water
- Air pump & air stone (optional but recommended)
Inoculating with Spawn
Spawn is the mushroom mycelium used to colonize your sterile substrate. It comes as grain spawn (rye berries, millet, etc), wood chips, or liquid culture.
To inoculate:
- Wear gloves and a mask to limit contamination
- Open spawn under a flowhood or near HEPA filter if possible
- Use a sterile tool to break up and distribute spawn throughout the pasteurized substrate
- Seal container openings with micropore tape
- Label with mushroom variety and date
- Store in dark place around 70-75°F for colonization
- Monitor temperature and provide fresh air exchange daily. White mycelium will spread through the substrate over 1-4 weeks.
Fruiting Conditions and Harvest
Once the substrate is fully colonized, it's time to induce fruiting. For oysters and lions mane, this means:
- Cut vent holes high on the sides of the container and cover with micropore tape
- Mist sides daily to maintain high humidity
- Provide indirect sunlight or grow lights on a 12/12 hour timer
- Within 5-14 days you'll see primordia forming, then mushrooms!
- Harvest whole clusters when caps flatten by twisting or cutting at the substrate line. Refrigerate fresh mushrooms and dehydrate extras for future meals.
With regular care, you can get multiple flushes from each container over months. Just rehydrate between flushes. And once done, return used substrates to the garden as mulch.
I hope this step-by-step guide has you feeling confident to try your hand at home mushroom cultivation. It's a rewarding and relatively simple process. Just remember patience and following sterile procedures. Have fun and bon appétit with your homegrown mushrooms! Let me know if you have any other questions.

Post a Comment